brazilianvwbay.com
Would you like to react to this message? Create an account in a few clicks or log in to continue.


www.brazilianvwkombi.com
 
HomeSearchLatest imagesRegisterLog in
Got a query? Please use the Search Function to find the answers!
14 years of BraziBay fun!!
We're all about the volkswagenT2kombi
It's smiles more fun in a BraziBay!


 Newton Commercial Interior Trim Install

Go down 
4 posters
AuthorMessage
TimV
Admin
TimV


Cabin : Flight 001
Location : Brighton, East Sussex U.K.
Posts : 14337
Join date : 2009-09-27

Newton Commercial Interior Trim Install Empty
PostSubject: Newton Commercial Interior Trim Install   Newton Commercial Interior Trim Install EmptyFri Mar 18, 2011 5:03 pm

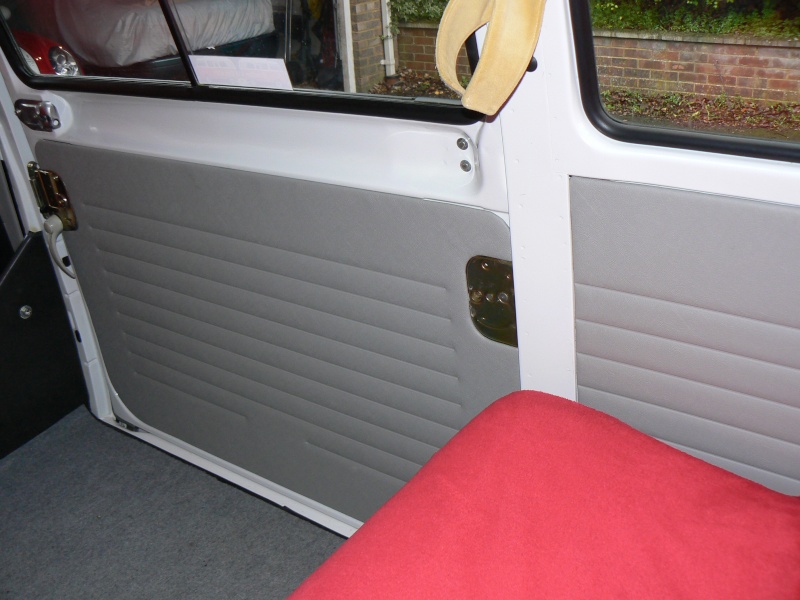
This install covers the 5 piece set that replaces the 2 front door cards, the sliding door panel, offside rear wheel arch panel and tailgate panel.
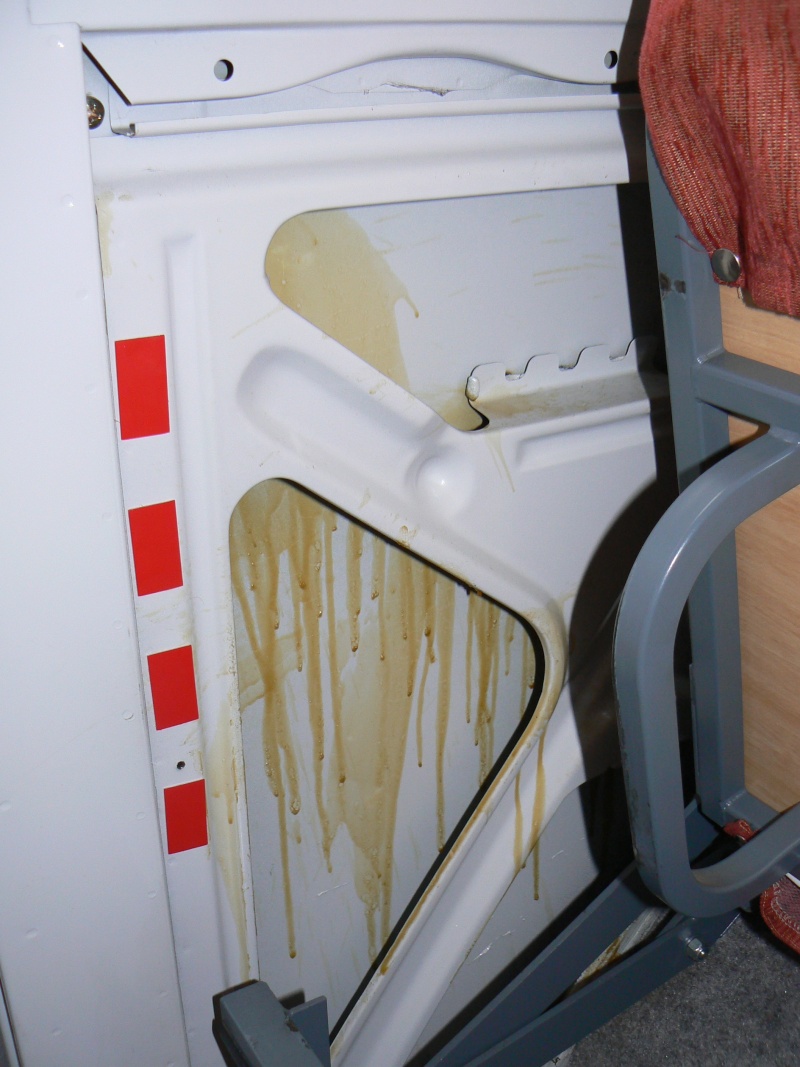
Cab Door Panels

The replacement of the door cards is the most complicated task and a video guide is available by clicking this link:

Newton Commercial Door Card Install Video Guide

The install follows this procedure:

1. Strip the door of its furniture - keep all screws, clips etc in one place so as not to lose them.

2. Remove the door card from the bottom first - remembering to disconnect any speaker wires as necessary.

3. Use this opportunity to lubricate the door mechanisms with white grease and if not already done - Waxoyl the inside of the door.

4. Check the waterproof membrane for unnecessary holes/tears - repair them if necessary to keep the integrity of the membrane.

5. Lay the old door panel on top of the new one and mark (on the back) where the factory holes for the clips went. This will indicate the position you need to fit the new offset clips in. Do not fit any clips at this point.

6. Rub candle wax into the back of the new door cards to waterproof them.

7. Push out the pre-cut air vent and speaker holes if required and cut the vinyl to fit - but leave plenty of excess to fold back in and around to the back of the panel. Now fit the old air vent and speaker to the new panel.

8. Fit 2 offset clips to the top edge of the panel and one to the bottom. Now offer the panel up to the door of your Kombi and fit the top 2 clips then the bottom one. You are doing this to check the position of the door trigger escutcheon. Hold the escutcheon in place and ensure the trigger works freely. You may have to slide the panel slightly left or right to get this to work well.

9. Whilst the panel is temporarily on the door gently rub your finger where the window winder spigot is. This will mark on the back of the door card where you need to cut the hole for the spigot to go through.

10. Take the panel off the door and fit the remainder of the clips with the A shape section sitting within the circle you drew on the back of the card. This will ensure the clips line up with the holes in the door panel.

11. Make 2 holes in the vinyl where the door handle will fit.

12. Now fit the panel onto your Kombi's door again starting with the top section of clips. Reconnect the speaker wires NOW before you push too many of the lower clips in.

13. Refit the door furniture.
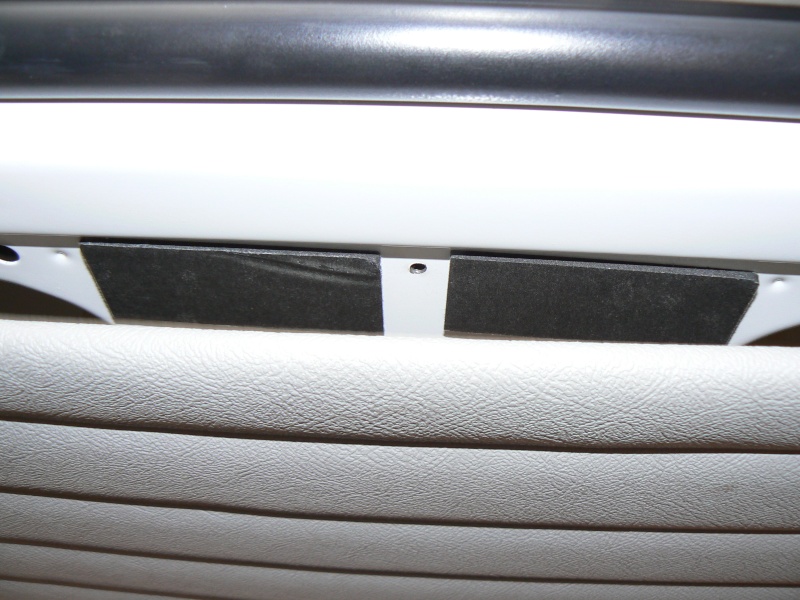
Tailgate Panel

The old panel is held on by a number of screws which have plastic caps - some of which may have fallen off over time! Remove all the screws and caps and you'll see that the tailgate actually has specific holes to take a trim panel - you will use these to fit the new NC panel. Keep all the old screws and caps - you may need them later.

1. Before you prepare the new panel clean up the inside of the tailgate. If necessary spray in some anti-corrosion protection and most definitely lubricate the now exposed tailgate lock mechanism with white grease.
Newton Commercial Interior Trim Install P1020623

2. Now rub a household candle over the back of the new panel to give it a waterproof coating.

Newton Commercial Interior Trim Install Tailga10

3. Offer up the panel to the tailgate and you'll see that the majority of the clips will need to face out towards the edges of the new panel.

4. Before you fit the clips to the panel, expand the A shape so that it is wider - this will give it more strength once in the fixing hole of the tailgate.

5. Slide each clip into the circular cut-out in the NC panel and rotate it into position gently using a pair of pliers and lifting it up over the adhered vinyl so as not to snag it.

6. Take the panel back to your Kombi every now and then to check the position of the clips as you add them.

Newton Commercial Interior Trim Install P1020624

7. Once you are happy that each clip is sitting directly where the holes appear in the metal of the tailgate, start to gently push them in, following around the edge of the panel.

8. Open and close the tailgate a number of times to check the panel's strength. If any area pops out of its fixing it may be necessary - as I found - to fit a couple of sticky pads just to aid the function of the clips.

Newton Commercial Interior Trim Install P1020625

Tailgate panel completed:

Newton Commercial Interior Trim Install P1020626

Sliding Door Panel

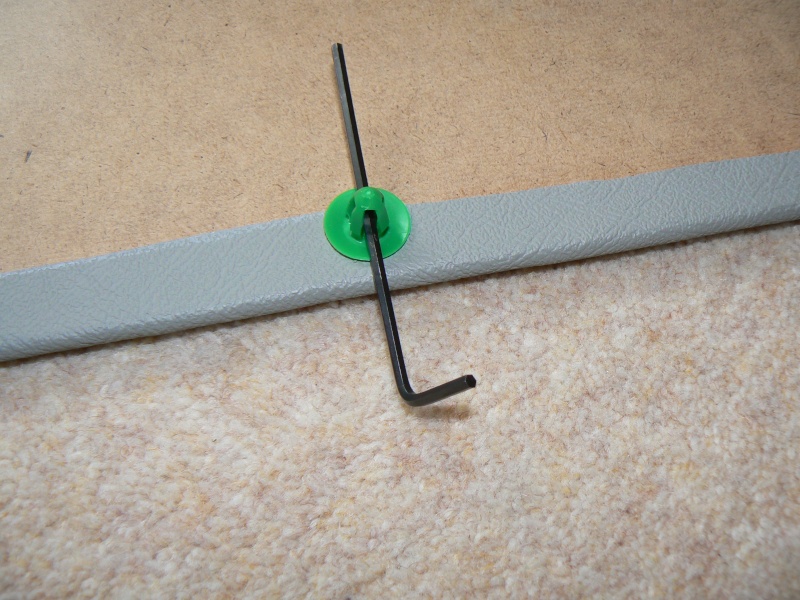
The NC Sliding Door Panel makes use of a different type of clip. These plastic clips need to be slid into the cut out holes in the new panel and they sit centrally to fit straight into the factory holes of the door. They're a bit fierce to get into the NC panel with just your fingers so use a mini- brace to twist them in. I used a small allen key and it worked beautifully:

Newton Commercial Interior Trim Install P1020627


Newton Commercial Interior Trim Install P1020628

1. The old panel can be removed by gently pulling at the edges and popping each clip out. Don't throw anything away - you may need something later.

2. As with the tailgate, clean up the inside of the sliding door, Waxoyl the cavities and lubricate the mechanisms with white grease - it should be sometime before you need to see these bits again.

Newton Commercial Interior Trim Install P1020629

Newton Commercial Interior Trim Install P1020630

3. Fit all the clips to the holes around the edge of the NC Sliding Door Panel. DO NOT fit clips to the 4 centre holes - these are not required and may cause an indentation effect that you would not want.

Newton Commercial Interior Trim Install P1020631

4. Now take the new panel into your Kombi and shut the door - it's the only way you can get to all the necessary holes and having the door closed makes it much easier to pop all the new clips in. Fit the top line first and work your way around the edge of the trim.

Sliding Door Panel completed:

Newton Commercial Interior Trim Install P1020632

Wheel Arch Panel

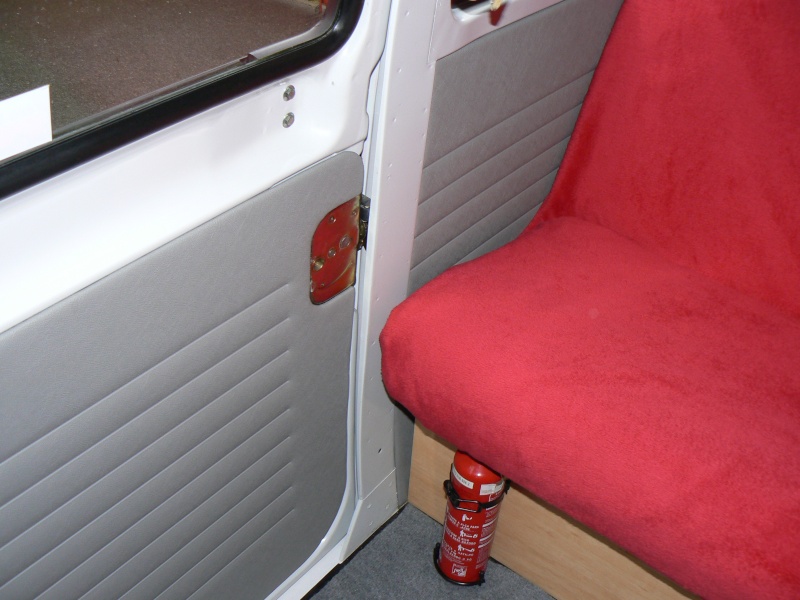
The factory wheel arch panel is held along the top by pop-in clips the same as those found on the cab doors and sliding door. Down the longer vertical edge it has a couple of screws, one screw underneath the base of the rear seat and one at the bottom of the backrest. They may have plastic covers.

1. Remove the old panel and lay it on top of the back of the new NC panel. Use the holes on the old panel as a template to mark on the back of the new panel where you need the offset clips to point towards.

Newton Commercial Interior Trim Install P1020633
Newton Commercial Interior Trim Install P1020634
Newton Commercial Interior Trim Install P1020635

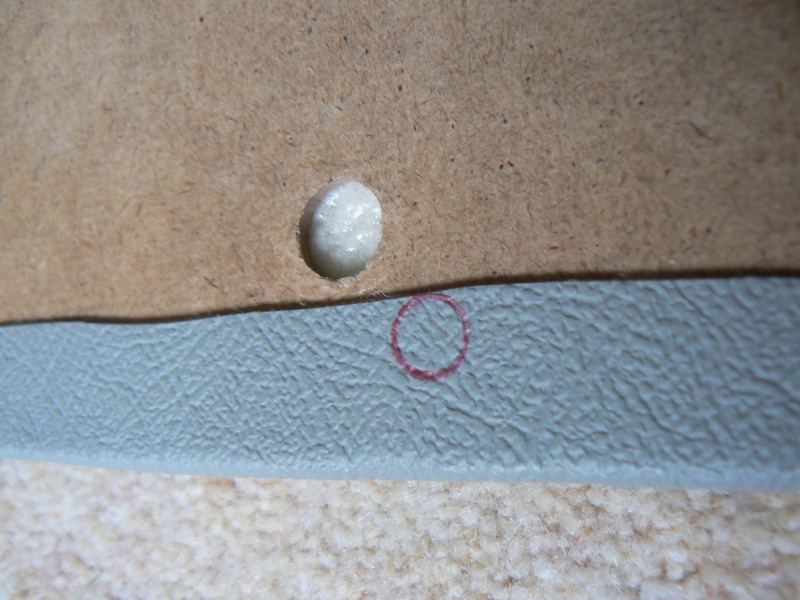
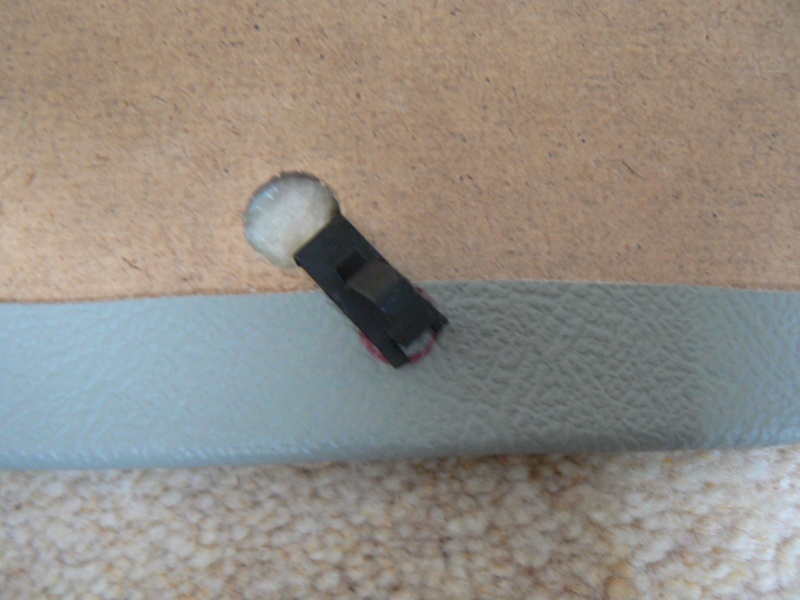
2. Fit all the clips along the top of the new panel, then put the old panel over the top of it again as a template to mark where the screw holes go down the bottom of the panel.

Newton Commercial Interior Trim Install P1020636

3. If, like me, you don't want to put a screw half way down the long edge of the new panel, you can use a few sticky pads instead. I think this looks much better.

Newton Commercial Interior Trim Install Wheela10

4. I re-used 2 of the bottom screws and painted the original plastic covers to match the new NC panel.

Wheel Arch Panel completed:

Newton Commercial Interior Trim Install P1020637

________________________________________________________________________________
Max SportsKombi - The Bay Racer Wink
@brazilianvwbay

Newton Commercial Interior Trim Install Melogo11


Last edited by TimV on Mon Jun 20, 2011 2:53 am; edited 1 time in total
Back to top Go down
TimV
Admin
TimV


Cabin : Flight 001
Location : Brighton, East Sussex U.K.
Posts : 14337
Join date : 2009-09-27

Newton Commercial Interior Trim Install Empty
PostSubject: Re: Newton Commercial Interior Trim Install   Newton Commercial Interior Trim Install EmptySat Mar 19, 2011 6:32 am

Updated Basketball

________________________________________________________________________________
Max SportsKombi - The Bay Racer Wink
@brazilianvwbay

Newton Commercial Interior Trim Install Melogo11
Back to top Go down
tiggy23

tiggy23


Cabin : Club
Location : East Sussex
Posts : 162
Join date : 2011-02-06

Newton Commercial Interior Trim Install Empty
PostSubject: Re: Newton Commercial Interior Trim Install   Newton Commercial Interior Trim Install EmptyTue Mar 29, 2011 9:50 pm

very good instructions Tim, I might need them soon! Wink
Back to top Go down
TimV
Admin
TimV


Cabin : Flight 001
Location : Brighton, East Sussex U.K.
Posts : 14337
Join date : 2009-09-27

Newton Commercial Interior Trim Install Empty
PostSubject: Re: Newton Commercial Interior Trim Install   Newton Commercial Interior Trim Install EmptyTue Mar 29, 2011 11:08 pm

Go for it tiggy!

What colour are you planning to order?

________________________________________________________________________________
Max SportsKombi - The Bay Racer Wink
@brazilianvwbay

Newton Commercial Interior Trim Install Melogo11
Back to top Go down
tiggy23

tiggy23


Cabin : Club
Location : East Sussex
Posts : 162
Join date : 2011-02-06

Newton Commercial Interior Trim Install Empty
PostSubject: Re: Newton Commercial Interior Trim Install   Newton Commercial Interior Trim Install EmptyTue Mar 29, 2011 11:51 pm

Surprise! It's not an expected one... Cool
Back to top Go down
TimV
Admin
TimV


Cabin : Flight 001
Location : Brighton, East Sussex U.K.
Posts : 14337
Join date : 2009-09-27

Newton Commercial Interior Trim Install Empty
PostSubject: Re: Newton Commercial Interior Trim Install   Newton Commercial Interior Trim Install EmptyTue Mar 29, 2011 11:54 pm

Okay...... I guess we might be needing shades when we're heading inside your Kombi maybe??? Whatever, have fun choosing and don't forget to flash up some pix when it's all done.

________________________________________________________________________________
Max SportsKombi - The Bay Racer Wink
@brazilianvwbay

Newton Commercial Interior Trim Install Melogo11
Back to top Go down
kiteman

kiteman


Cabin : Exec 002
Location : Hampshire
Posts : 2896
Join date : 2010-03-19

Newton Commercial Interior Trim Install Empty
PostSubject: Re: Newton Commercial Interior Trim Install   Newton Commercial Interior Trim Install EmptyWed Mar 30, 2011 8:11 am

Get ginger coloured ones Laughing

________________________________________________________________________________
Newton Commercial Interior Trim Install Img_4810

Ginger man without a ginger van  sunny
Back to top Go down
tiggy23

tiggy23


Cabin : Club
Location : East Sussex
Posts : 162
Join date : 2011-02-06

Newton Commercial Interior Trim Install Empty
PostSubject: Re: Newton Commercial Interior Trim Install   Newton Commercial Interior Trim Install EmptyWed Mar 30, 2011 10:12 am

You never know ginger, certainly you are an inspiration... Wink
Tim, I love colours and work with them a lot, I get so excited when I need to choose them!!! In Tiggy it's all started as we didn't like the original ones inside... Not in line with the seventies T2 Bay design!!
Back to top Go down
Baydreamer

Baydreamer


Cabin : Club
Location : medway kent
Posts : 426
Join date : 2010-04-11

Newton Commercial Interior Trim Install Empty
PostSubject: Re: Newton Commercial Interior Trim Install   Newton Commercial Interior Trim Install EmptyWed Mar 30, 2011 6:29 pm

I recommend dayglow bright orange with matching curtains and a mirror ball with a bit of barry white music!!!
Back to top Go down
TimV
Admin
TimV


Cabin : Flight 001
Location : Brighton, East Sussex U.K.
Posts : 14337
Join date : 2009-09-27

Newton Commercial Interior Trim Install Empty
PostSubject: Re: Newton Commercial Interior Trim Install   Newton Commercial Interior Trim Install EmptyWed Mar 30, 2011 7:25 pm

The membrane is a factory installation but as is often the case, as soon as people start tinkering with the door it gets screwed up and compromised. You should try to reinstate its integrity by using clear strong repair tape. It's available from B&Q etc.

Yes Waxoyl is an oily protective coating that prevents moisture attacking the metal. Every Kombi owner should Waxoyl the interior panels and sections of their BraziBay. It is not done at the factory and only by some of the new Kombi suppliers here in the UK. It ought to be standard.

Ask away - it's what this site is all about. Basketball

________________________________________________________________________________
Max SportsKombi - The Bay Racer Wink
@brazilianvwbay

Newton Commercial Interior Trim Install Melogo11
Back to top Go down
Baydreamer

Baydreamer


Cabin : Club
Location : medway kent
Posts : 426
Join date : 2010-04-11

Newton Commercial Interior Trim Install Empty
PostSubject: Re: Newton Commercial Interior Trim Install   Newton Commercial Interior Trim Install EmptyWed Mar 30, 2011 7:53 pm

I have yet to do mine but will do so when the weather gets better as the liquid based oil can be pumped into the door areas with the pump avaliable and warmer weather ensures it spreads better for the doors and anywhere else you wish to pump it. I used it for my mini years ago and its great stuff and use as much as you can to ensure good coverage and get a drip from the bottonm of the door as Tim said. The spray should work equally as good but I believe candle wax has been recommended on this forum in the past aswell.
lets us know how you get on please.
Back to top Go down
kiteman

kiteman


Cabin : Exec 002
Location : Hampshire
Posts : 2896
Join date : 2010-03-19

Newton Commercial Interior Trim Install Empty
PostSubject: Re: Newton Commercial Interior Trim Install   Newton Commercial Interior Trim Install EmptyWed Mar 30, 2011 8:12 pm

mhami wrote:
Saw this on Amazon... will this do the trick?

Hammerite Waxoyl Clear 400 ml Aerosol


Yep that's the stuff. You can also get a kit with a hose and nozzle to get deep into all the nooks and crannies.

Rub the candle on the back of the door card the help seal it.

________________________________________________________________________________
Newton Commercial Interior Trim Install Img_4810

Ginger man without a ginger van  sunny
Back to top Go down
tiggy23

tiggy23


Cabin : Club
Location : East Sussex
Posts : 162
Join date : 2011-02-06

Newton Commercial Interior Trim Install Empty
PostSubject: Re: Newton Commercial Interior Trim Install   Newton Commercial Interior Trim Install EmptyWed Mar 30, 2011 10:26 pm

I've recently got some grease for my joints and steering and forgot about Waxoyl... need to get some

tiggy cat
Back to top Go down
Sponsored content


Newton Commercial Interior Trim Install Empty
PostSubject: Re: Newton Commercial Interior Trim Install   Newton Commercial Interior Trim Install Empty

Back to top Go down
 
Newton Commercial Interior Trim Install
Back to top 
Page 1 of 1
 Similar topics
-
» Newton Commercial Door Card Install Video Guide
» Club visit to Newton Commercial, Leiston, Suffolk - Tues 8th Feb 2011
» Interior Trim
» Buddy Seat Install
» CTEK Battery Charger Install

Permissions in this forum:You cannot reply to topics in this forum
brazilianvwbay.com :: Maintenance/Technical :: Kombi Kreative-
Jump to: